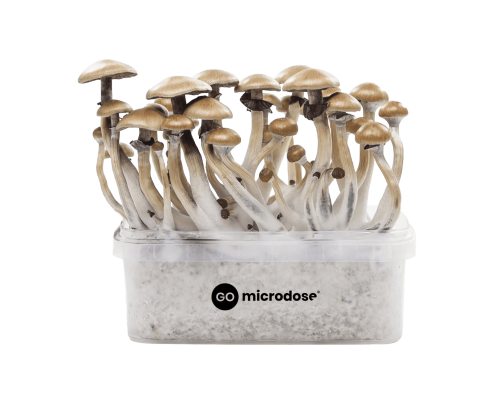
Cultivating with GO Microdose growkits
Embrace the joy of mushroom cultivation with our easy-to-use GO Microdose Growkits. These kits come with a fully colonized substrate devoid of fillers, making the cultivation process extremely straightforward and virtually maintenance-free. There’s little you need to do to yield your first mushroom flush. All you have to do is follow the simple instructions outlined below, or refer to our downloadable PDF guide, and you’re guaranteed a plentiful harvest.

Introduction
Timely cultivation: It is highly recommended to start cultivating as soon as you receive the kit. Storing it is not advised, unless you have no other choice.
Refrigeration: Store your kit in the refrigerator at a temperature of 3-5°C. You can then store the set for a maximum of 4 weeks, but we cannot provide guarantees. (no freezing)
Seal in a plastic bag: Store the kit in a sealed, clean plastic bag to minimize the risk of contamination.
Avoid opening: Never open your grow kit before you are ready to start using it. Opening it can introduce contaminants that may compromise the sterile environment inside the kit.
Stay away from light: Always store your grow kit in a dark place. Excessive light exposure can trigger premature growth or can have a drying effect.

Things to keep in mind
- Don’t soak or spray them, you can leave them in the bag without opening it.
- Don’t use aluminum foil when growing mushrooms; it’s not needed with these kits.
- Don’t breathe into the bag.
- Always wash your hands before working with the grow kit.
- These kits are 100% ready to grow.
Step-by-step plan


Step 01
Unpacking
Lightly moisten the surface by sprinkling some water on it. You can achieve this by briefly placing it under the tap. Ensure that the kit is adequately moistened but avoid over-saturating it. It should not be soaking wet. After this, don’t add any more water.

step 02
Lightly moisten
Lightly moisten the surface by sprinkling some water on it. You can achieve this by briefly placing it under the tap. Ensure that the kit is adequately moistened but avoid over-saturating it. It should not be soaking wet. After this, don’t add any more water.
If a heating mat is being used, keep it on for two days, then lightly sprinkle some water over it again.

step 03
Position the bag
Situate the lid-less growkit within the provided plastic bag. Position the bag’s opening underneath its bottom side, ensuring the micro-perforation is facing upwards. The bag’s opening will now be mostly sealed, but there’s no need for concern about air circulation.

step 04
The emergence
As soon as tiny bulb-like growths begin to appear, you can transition the bag to an upright position. Avoid adding any water at this stage. The emergence of the first mushrooms should be noticeable approximately one week from this point.

step 05
Optimal environment
Situate the growkit in an environment that offers ample daylight and maintains a temperature between 18 °C and 28 °C. It’s essential to NEVER expose the grow kit to direct sunlight. While mushrooms can grow at virtually any temperature above 15 °C, the optimum temperature for a thriving harvest is 23 °C. To ensure this specific temperature without the necessity to heat the entire room, specialized heat mats are available for your convenience.

step 06
Maximum yield
At this stage allow the bag to remain slightly open continuously to let some moisture escape. Excess moisture can be detrimental. Approximately a week after the first bulbs appear, you can anticipate your initial harvest. Ensure that you harvest prior to the first spores beginning to fall.
step 07
Revitalize & regrow
These kits produce multiple mushroom harvests. To do this, after the first harvest, fill the kit with clean tap water. This process is known as cold-shock and breathes new life into the mycelium and ensures that there is enough moisture for the mushrooms to grow.

step 08
Reset & reuse
Reposition the lid of the culture kit onto the kit. Let the kit rest for a period of 12 hours. Afterward, open a corner of the lid to drain any excess water. From this point, you can resume following the instructions provided in step 3. This entire process can be executed several times over.
EVERYTHING
About harvesting
The mushrooms in your growkit will typically be ready to harvest approximately 1-2 weeks after the first signs of growth, although this can vary depending on specific growing conditions.
You’ll know they’re ready to be harvested when the veils under the caps begin to tear. The veil is a thin, web-like material that connects the stem and cap. If the veil tears and the caps open fully, the mushrooms will begin to release spores, which is generally considered past the optimal point of harvest.
Remember, every mushroom grows at its own pace, so you’ll likely be harvesting them over several days, not all at once. Always handle your mushrooms with clean hands to avoid contaminating the growkit.
Please remember that growing mushrooms can be a complex process and it’s essential to follow the instructions provided with your growkit carefully for the best results.
How to
Harvest
- Cleanliness is crucial when harvesting your growkit. Make sure you thoroughly wash your hands and forearms with disinfectant soap and wear sterile gloves when it’s time to harvest.
- It is imperative that you harvest your mushrooms before the veils under the caps tear. If you don’t, the kit will likely not produce any more flushes!
- Grab the base of the stem and twist and pull the mushroom away with a gentle motion. It’s important that you twist and don’t just pull, as you can damage the mycelium, which may have negative consequences for your next flush.
- After harvesting, the stems can develop a bluish tint. This phenomenon is known as “bruising,” but there’s no need to worry about it. It actually proves the strength of the flesh of the gods!
Dry the mushroom
One of the essential steps after harvesting your mushrooms is drying them. The drying process is crucial because it preserves the mushrooms’ quality, extends their shelf life, and most importantly, stabilizes their psychoactive compounds. Moisture is the enemy of both storage and potency. Wet mushrooms can develop mold, which will ruin their taste, texture, and efficacy. Moreover, psilocybin, the psychoactive compound in magic mushrooms, degrades slowly in the presence of heat and humidity. Therefore, appropriate drying methods help retain the potency of the mushrooms, ensuring you get the most out of your harvest. Here are the expanded methods:

Store
Storing mushrooms correctly is just as important as drying them, as improper storage conditions can significantly decrease their potency over time. Storing mushrooms properly keeps them potent, fresh, and safe to consume. The storage environment needs to be controlled because mushrooms are sensitive to light, heat, and moisture, all of which can lead to decreased potency and the potential for mold growth. Here are the best practices for storing your dried magic mushrooms:

Consume
The final step is consuming your harvested and dried
mushrooms. The method of consumption can significantly affect your experience with magic mushrooms. Certain methods can alter the intensity and duration of the mushrooms’ effects and can even enhance their flavor, making the overall experience more enjoyable. Plus, the right consumption method will depend on your personal preferences and the specific results you’re looking to achieve, whether that’s a full psychedelic trip or a subtle enhancement of your day-to-day mental state through microdosing. Let’s delve into the most common
methods of consuming dried magic mushrooms:

Our products
-

Golden teacher growkit
Golden Teacher magic mushrooms are renowned for their ability to provide a deeply meaningful and philosophical experience.
- & more
-
B+ growkit
The B+ magic mushroom is a versatile strain that offers a unique blend of visual and introspective qualities, making it a favorite among enthusiasts.
- & more
-
Colombian growkit
The Colombian magic mushroom strain is known for its strong, cerebral effects, often chosen by those seeking a deep, thought-provoking experience.
- & more
-
McKennaii growkit
McKennaii magic mushrooms are celebrated for their intense visual hallucinations, time distortion, and a heightened appreciation for sounds and colors.
- & more
-
Mexican growkit
The Mexican magic mushroom strain, a direct descendant of the Psilocybe cubensis species, is known for its lighter, feel-good effects that are great for beginners.
- & more