- Written on
- 8 min. reading time
If you’re choosing your first mushroom growkit, you’ll quickly encounter two paths: buying a ready-to-grow kit or assembling your own substrate from scratch. For most beginners, a pre-made mushroom growkit is the safest and simplest option. It arrives fully colonized, requires minimal equipment, and dramatically reduces contamination risk. DIY substrate preparation can save money at scale, but demands sterile technique, specialized tools, and patience—making it better suited to growers with experience or a strong interest in mycology.
What is a pre-made mushroom growkit?
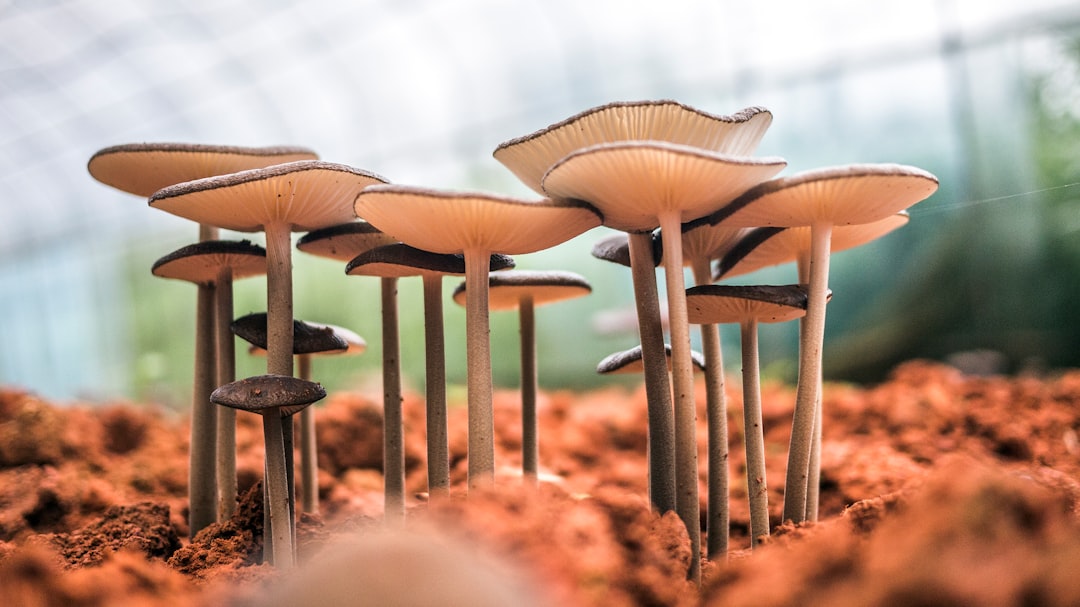
A pre-made mushroom growkit is a fully colonized substrate block sealed in a grow bag or box. The mycelium has already spread through the grain or compost mixture under sterile lab conditions. When it arrives at your door, the hard work is done. You simply open the kit, introduce fresh air and humidity, and wait for mushrooms to fruit.
These kits are designed to minimize user error. Companies like GO Microdose offer several mushroom growkit varieties including Golden Teacher, McKennaii, and B+, all pre-colonized and ready to fruit. The process is standardized, the risk of contamination is low, and the learning curve is gentle.
Most kits produce multiple flushes—often three to five rounds of mushrooms—with yields ranging from 300 to 800 grams of fresh mushrooms per kit depending on strain and care. For someone taking their first step into cultivation, this reliability is invaluable.
What does DIY substrate preparation involve?
Building your own substrate means starting from raw materials: grain (rye, millet, or popcorn), coco coir, vermiculite, gypsum, and sometimes manure. You sterilize or pasteurize these ingredients, inoculate them with mushroom spores or liquid culture, and wait weeks for the mycelium to colonize the substrate in sterile conditions.
This approach requires equipment most beginners don’t own:
- Pressure cooker (for grain sterilization)
- Still air box or laminar flow hood
- Sterile jars, spawn bags, or monotub containers
- Spore syringes or agar cultures
- Isopropyl alcohol, gloves, and sterile technique discipline
Even with proper preparation, contamination is common. Mold spores are everywhere. A single lapse—touching the syringe tip, opening a jar too early, inadequate sterilization—can ruin weeks of work. The learning process involves trial, error, and often frustration before success.
How do costs compare?
A quality pre-made mushroom growkit costs between £30 and £50. This includes the colonized substrate, grow bag, and instructions. If you harvest 400 grams fresh across multiple flushes, your cost per gram is roughly £0.08 to £0.13.
DIY substrate materials are cheaper per batch—around £10 to £15 for enough grain and bulk substrate to fill a shoebox-sized tub. But upfront equipment costs are significant. A pressure cooker runs £60 to £150, a still air box costs £20 to build, and spore syringes are £10 to £15 each. Your first DIY grow might cost £100+ before you see a single mushroom.
If you plan to grow repeatedly over months or years, DIY becomes more economical. If you’re testing the waters or only want a few harvests, a ready-made kit offers better value and far less hassle.
Which approach has better contamination control?
Pre-made kits are colonized in professional lab environments with controlled airflow and sterile protocols. By the time the kit reaches you, contamination risk is minimal. Your main job is maintaining humidity and fresh air exchange, not fighting mold.
DIY growers face contamination at every stage: during sterilization, inoculation, and colonization. Green mold (Trichoderma), cobweb mold, and bacterial contamination are frequent visitors. Even experienced cultivators lose batches. If you’re unfamiliar with what healthy mycelium looks like versus early contamination, mistakes are easy to make. Our guide on growkit contamination covers what to watch for and how to respond.
For beginners, the reduced contamination risk of a pre-made kit is one of its strongest advantages. You can focus on learning fruiting conditions—temperature, humidity, light cycles—without the added complexity of sterile inoculation technique.
What about learning and control?
DIY substrate work teaches you mycology from the ground up. You learn grain preparation, spawn-to-bulk ratios, moisture content, and how different substrates affect yield and potency. This knowledge is empowering if you want to experiment with strains, substrates, or cultivation techniques.
But this depth comes at the cost of time and complexity. A pre-made mushroom growkit lets you skip the steep learning curve and get straight to the rewarding part: watching mushrooms emerge and managing harvests. You still learn about fruiting conditions, pinning triggers, and when to pick mushrooms for optimal potency, but without the months of preparatory study.
If your main goal is a reliable personal supply rather than mastering cultivation science, a kit is the pragmatic choice. If you’re fascinated by the process itself and plan to grow long-term, investing in DIY skills and equipment may be worth it.
Which strains work best in pre-made kits?
Most commercial mushroom growkits feature beginner-friendly strains known for resilience and consistent yields. Golden Teacher is forgiving, produces large flushes, and fruits reliably even with minor environmental fluctuations. B+ is similarly robust, adapting well to varying humidity and temperature.
McKennaii is slightly more potent and fruits densely, though it may be a bit more sensitive to conditions. Mexican and Colombian strains are also common in kits, offering moderate potency and straightforward cultivation. All of these are available as ready-to-grow kits that require no prior experience.
DIY growers have access to a broader variety of strains through spore vendors, but many exotic or rare genetics are temperamental and best suited to experienced hands. Starting with a reliable strain in kit form builds confidence before branching into more adventurous territory.
What equipment do you actually need?
With a pre-made mushroom growkit, the essentials are minimal:
- The kit itself (substrate block in grow bag)
- A spray bottle for misting
- A well-lit spot away from direct sunlight
- Optional: a heat mat if your home is cold
Many growers also use our growkit essentials bundle, which includes a thermometer, hygrometer, and perlite for humidity control. Everything fits on a shelf or countertop.
DIY substrate growers need significantly more:
- Pressure cooker (23L minimum recommended)
- Mason jars or spawn bags
- Still air box or flow hood
- Spore syringes and sterile needles
- Substrate ingredients and mixing containers
- Monotub or fruiting chamber
The difference in barrier to entry is substantial. Kits let you start immediately; DIY requires upfront investment and space.
Can you transition from kits to DIY later?
Absolutely. Many successful DIY cultivators started with a pre-made mushroom growkit to understand the fruiting process, environmental needs, and what healthy mushroom development looks like. Once you’ve completed a few successful harvests and feel confident managing temperature, humidity, and air exchange, the leap to DIY becomes far less intimidating.
You can even use your first kit as a learning tool: take notes on pinning times, flush intervals, and how the substrate behaves. This observational knowledge translates directly to managing your own colonized substrate later.
Starting with a kit also means you’re not investing heavily in equipment before you know whether cultivation suits you. If you discover you enjoy the process and want more control or lower per-grow costs, you can gradually acquire pressure cookers, flow hoods, and other tools. If you’re satisfied with occasional kit-based grows, you’ve saved money and avoided unnecessary complexity.
Frequently asked questions
How long does a mushroom growkit take from opening to first harvest?
Most kits produce visible pins (baby mushrooms) within 5 to 10 days of opening, and mushrooms are ready to harvest 5 to 7 days after pinning. Total time from opening the kit to first harvest is typically 10 to 17 days, depending on strain and environmental conditions.
Can you reuse a mushroom growkit for multiple flushes?
Yes. After harvesting the first flush, soak the substrate block in cold water for 12 hours, drain it, and return it to fruiting conditions. Most kits produce three to five flushes, with diminishing yields each time. Total output can reach 400 to 800 grams fresh across all flushes.
Is DIY substrate cheaper if you only want one or two grows?
No. The upfront equipment cost for DIY (pressure cooker, still air box, jars, spore syringes) typically exceeds £100. A single pre-made mushroom growkit costs £30 to £50 and produces several hundred grams. DIY becomes cost-effective only after multiple grows spread over months.
What is the main reason DIY substrate grows fail for beginners?
Contamination is the leading cause of failure. Mold spores and bacteria thrive in the same warm, moist conditions mushrooms need. Without sterile technique and proper sterilization of grain and tools, contamination outcompetes the mushroom mycelium before fruiting occurs.
Do pre-made growkits produce weaker mushrooms than DIY grows?
No. Potency is determined by genetics (strain) and harvest timing, not whether the substrate was colonized in a lab or your kitchen. A Golden Teacher kit produces the same alkaloid profile as a DIY Golden Teacher grow. Proper harvesting—just before the veil breaks—matters more than substrate origin.
Can you start with a kit and later clone mushrooms for DIY grows?
Yes. Once your kit fruits, you can take a tissue sample from a healthy mushroom, transfer it to agar in sterile conditions, and use that culture to inoculate your own substrate later. This bridges the gap between kits and DIY, letting you preserve genetics you like without buying spores.
Final thoughts
For most first-time growers, a pre-made mushroom growkit is the clear choice. It removes the steepest barriers—sterile technique, equipment investment, contamination risk—and lets you focus on learning the basics of fruiting and harvest. Once you’ve successfully grown a few flushes and understand what healthy cultivation looks like, the door to DIY remains open. Browse our full range of growkits and cultivation supplies to get started today.